Regardless if the weather is bad, or you can’t/don’t have a grill or smoker, or you want something delicious, packed with flavor, and very easy – these are for you. You can cook amazingly tender, and flavorful ribs indoors!
Here’s what you do…
The Pork (this applies regardless of temperature)
Procuring quality meat is important. Pork is very temperamental – it must be butchered properly, stored properly, and transported properly. Even if it’s sourced from the best pigs, any flaws in the pre-listed categories could ruin the meat.
If you can find Berkshire pork (and can afford it), then by all means get it and invite me over. This pork comes from Berkshire pigs which are a very rare English breed with fewer than 300 sows in existence. Berkshire pork is known for its tender juiciness, flavor and heavy marbling – remember for meat fat (marbling) means flavor. Contact the American Berkshire Association in the US for more information and ordering guides.
For most of us, Berkshire is a bit out of the question. In the DC area, I prefer to head up to Wagshal’s. They have amazing product. Eastern market also has a wide variety of butchers to chose from, however with pork, as does Stachowski Market in Georgetown. However, almost anywhere in the US, you can find Smithfield pork – a company founded in 1936 that delivers quality pork products.
The Cut
For this style of cooking, you want baby back ribs (or loin ribs). These are taken from the top of the rib cage between the spine and the spare ribs, just below the loin muscle. They’re a bit meaty than spare ribs, and smaller in size. A typical rack should yield 10-13 ribs (bones). If buying from a butcher and your rack has 10 or less bones, that’s known as a “skim” or “cheater” rack. You are well within your right to ask for a discount or demand a larger rack.
The Prep
Always begin by rinsing the ribs off with cold water. Then, flip them over so the curved side (less meaty side) is facing up. You will see a layer of thin skin; this is the membrane and must be removed prior to cooking. To remove, slide a thin, preferably flexible boning knife along the bone to get under the membrane.
Tilt the knife handle up keeping the point against the bone to pry some of the membrane away from the bone. Then, work your fingers under the membrane and pull. It might take a few tries, but it’s worth it. If you don’t or can’t remove the membrane, your guests will have to bite, gnaw, and otherwise tear through it with their teeth as it firms up once cooked.
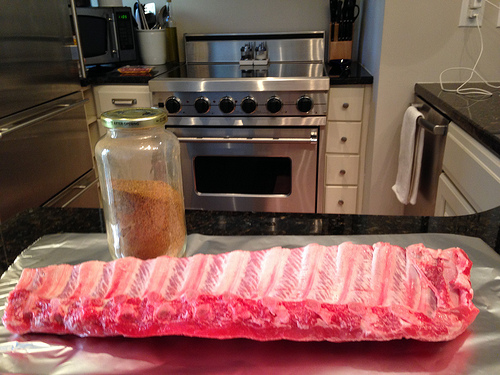
The Seasoning
Here’s where things can get a bit contentious. Being from Southeastern North Carolina, I have witnessed physical altercations that started with a simple discussion about seasoning ribs. I support fighting over meat…but usually for who gets the last rib. However, if you do find yourself coming to fisticuffs around ribs, the cooked bones break and splinter easily and might make a nice prison shank.
Some people apply liquid to their ribs prior to the rub. Up to you, but a good rub is key. My rub involved the following in measurements you can test out yourself to figure out which flavors you like most prominent:
- smoked paprika,
- salt,
- brown sugar,
- cumin,
- chile powder,
- black pepper,
- cayenne,
- onion powder,
- garlic powder,
- celery salt, and
- mustard powder
Wrap tightly in foil and refrigerate for 12-24 hours.
The Cooking
Take a deep breath, have a drink, and realize you’re about to preheat your oven to cook ribs in. Low and slow is the goal here and remember the lower your temperature, the longer you need to cook them. I prefer 260-275 degrees.
While your oven is preheating, remove your foil wrapped ribs from the refrigerator and let them come to room temperature. When ready, place the wrapped ribs on a cookie sheet on the middle rack.
Cook for 3-3.5 hours or until a internal thermometer reaches 145.
Note: the USDA recommends you cook pork to an internal temperature of 160 degrees. However, we still have some cooking to do, so we want them not quite done yet.
Remove rack from oven and cut foil. Beware of the face searing steam that is about to be released. Peel back the foil so that the top of the ribs are exposed. Place back in the oven for 10-15 minutes until a slight crust or darkened color appears on the top of the ribs.
The ribs are now edible…however, at this point, you do have some finishing options to bring your ribs to the next level.
The Next Level: How to properly finish your oven-cooked ribs
Once the previous steps have been completely, you have 2 options (with variations) to finish your ribs. Essentially, you want to provide a high, direct source of heat at the end of the process. This will crust the skin, sear the rub, or caramelize the sauce should you choose to add.
Option #1 – The Grill
If you have access to a grill, gas or charcoal, bring it to medium-high heat. If you want to sauce your ribs (BBQ sauce or vinegar based), now is the time. Apply sauce to the top/meaty part of the rib; carefully transfer to the grill with the sauced side down (facing the flame). Now, sauce your other side, and flip after 2-3 minutes. What you are looking for is to sear the sauce to the meat, giving it a little bit of color and richness. Sauces have sugar and will burn easily. Now is not the time for all of your hard work to go to waste. Translation: if you have been over-served by this point, please allow someone else to finish off your meaty perfection.
Option #2 – The Broiler
Leave the ribs on their original pan and turn on your broiler. Peel any remaining foil back and sauce the top/meaty part of your ribs as indicated above. Place under the broiler until the sauce has some color to it. There is no real need to flip them and sauce the backside using this method. If your ribs are too hard to transport, (aka already falling off the bone completely), this method may be preferred.
Follow these steps and whether you’re in a studio in Chelsea, an apartment in DC, or the weather doesn’t permit 4 hours of grilling, when your rib craving hits you’ll have perfect ribs each and every time.